

I used to hate the idea of a single-cup coffee maker. My experience with single-cup brewing came from an old Keurig which made weak and tasteless coffee.
If I wanted a weak and tasteless caffeinated beverage, I’d be a tea drinker.
Begrudging the lack of good options for making a single cup of coffee, I decided to exclusively use a french press as the closest alternative. I also wasn’t fond of this method: it’s a matter of personal taste, but I like my coffee strong and bold without the thickness that comes from a french press.
Given my hatred of the Keurig and the price of espresso machines, I thought there was no way I could make a single cup. I was wrong. And who knew I would be convinced not by a thousand-dollar machine set-up, but a $40 piece of plastic?
History
 The Aeropress was invented in 2005 by Alan Adler, a real-life coffee Santa Claus who hit it big in the toy industry but has also worked as everything from a nuclear engineer to a lecturer.
Eventually he became a business success with his invention of the Aerobie, a flying disk engineered for easy use. It built upon his prototype the “Skyro,” which used similar principles but failed to gain appeal because of its tendency to fly way too far to retrieve.
The major success of the Aerobie disk put Adler at the helm of an outdoor toy behemoth. Becoming the Willy Wonka of coffee seemed an unlikely step for Adler and Aerobie, but the company never fails to surprise.
Like all great inventions, the Aeropress started with a problem. When discussing coffee at the dinner table, Adler and his guests were frustrated with the difficulty of brewing a single cup of coffee using most commercial coffee makers.
He decided to create a device which could extract the flavors of coffee without the acidity of the pour-over method or the thickness of a french press. The Aeropress did just that, and for a price far lower than most coffee makers. It even had the unintentional bonus of being a breeze to clean.
Anatomy of an Aeropress
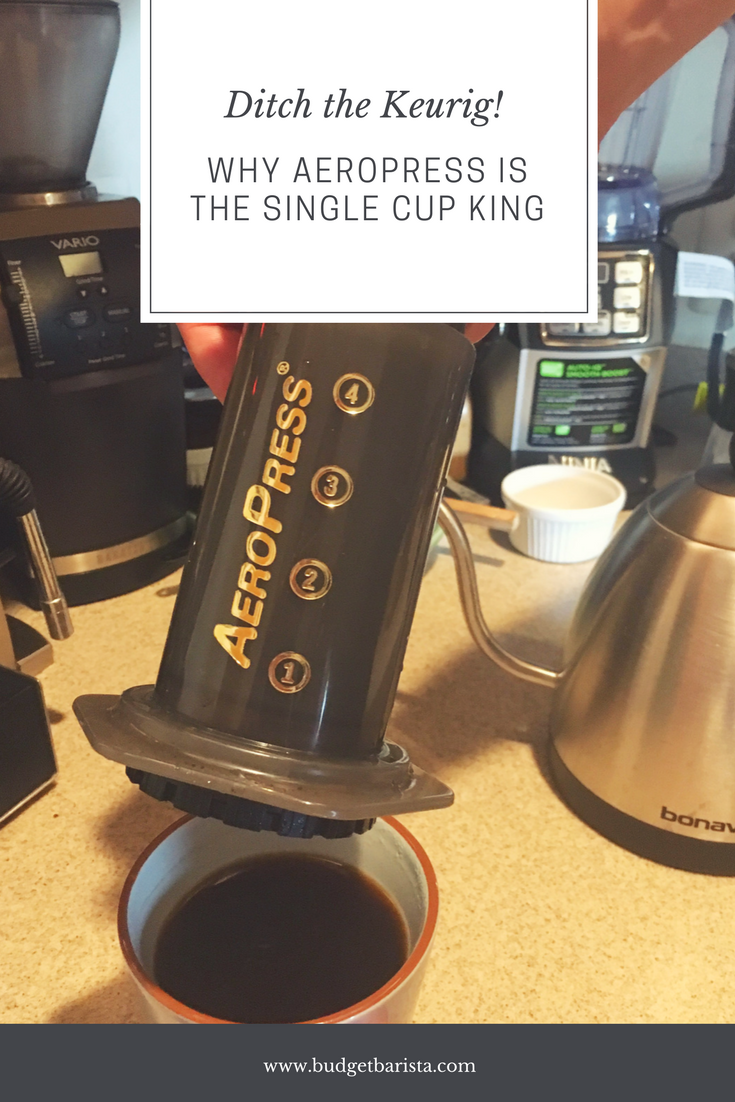
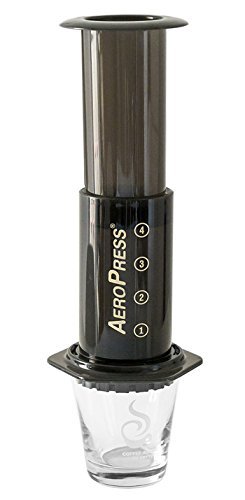
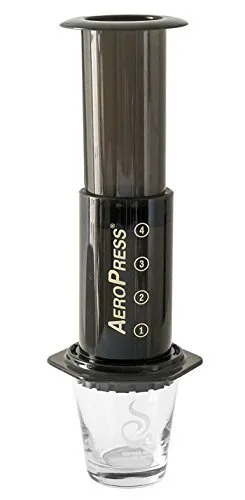
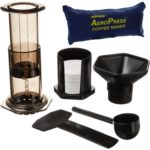
An Aeropress has a few component parts. The body of an Aeropress is a small “chamber” made of BPA-free plastic. There is a plunger made out of the same material, but including a rubber end that creates a vacuum seal when placed on top of the tube.
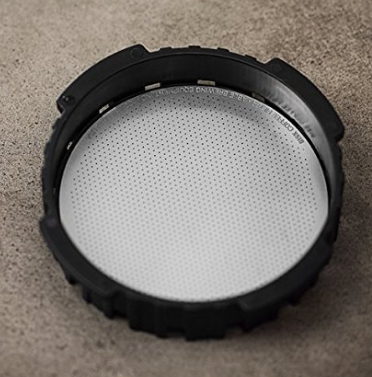
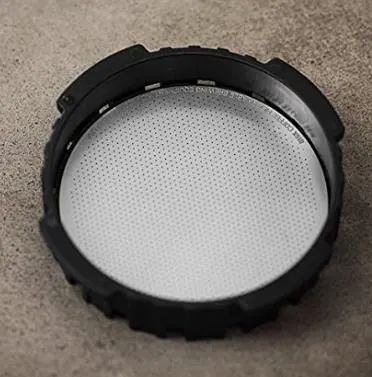
The filter cap has large holes similar to a honeycomb for coffee to pass through. The paper filters are designed specifically for the Aeropress, as is the Able Disk.
The Aeropress also comes with a funnel, scoop, and stirrer.
The (admittedly ugly) design of the Aeropress creates a chamber where coffee is forced down through ground coffee (at least when using the traditional method,) which allows flavors to be extracted quickly without the acidic and oily nature of coffee coming through in the end result.
What You Need
 Along with the device itself, you’ll need a kettle, a timer (or just the one on your smartphone,) a hand grinder, and either paper filters or the reusable Able Disk filter.
If you’re on the go and don’t have access to a kettle, use what’s available to you. On a train, that could mean asking for hot water from the cafe car. On a camping trip, heating purified water over the fire is always a good option or simply load up a Keurig sans pod and steal the cup of hot water from there.
The Able Disk filter has two benefits. The first is eco-friendliness: while Adler claims paper filters can be reused up to 25 times each, eco-friendly java junkies will still find themselves throwing away filters and killing trees in the process.
The second benefit is its ability to create a thicker brew. This is a matter of personal taste, but with the disk you get more small grounds coming into your brew. This gives you something more similar to a cup of french press. That being said, you can also get thickness by using a fine ground with the inverted method (more on that later,) and I’ve found the two techniques virtually indistinguishable.
Still, as a tree-hugger who feels guilty over his four cups a day of coffee, I have to recommend the more eco-friendly method.
If you were to get the Aeropress along with an Able Disk, you’d be looking at an initial investment of around $46. If you’re opting for the paper filters, be ready to spend about $8 for every 350 filters you go through.
Using Your Aeropress
Three popular ways to make coffee with your Aeropress are the traditional method, the inverted method, and an awesome machine-free cappuccino method.
Each of these methods cuts to the core of exactly what I love about the Aeropress: it doesn’t make you choose between ease, speed, and versatility.
Traditional Method
The traditional method of making a cup of coffee with your Aeropress is the quickest and most popular.
The first thing you’ll need to do is insert a paper filter or able disk into the Aeropress filter cap. Screw the filter cap into the bottom of the Aeropress tube.
Place the funnel on top and scoop in freshly ground coffee beans to your taste (I typically use 3-3.5 scoops on my first cup of the day and 2.5 to 3 for the rest of them. I empty my Aeropress between each cup for freshness.)
Heat your water to slightly below boiling. After the water is heated, slowly pour it until the tube is filled. Pouring too fast will result in overly acidic coffee, so try to spend about 10-15 seconds on the pour.
Then, press down with the plunger gently. Stop when you hear your Aeropress “degas” the air trapped near the coffee beans. Wait a few seconds for any remaining coffee to drip out and enjoy.
This is my preferred method, though pour-over and french press enthusiasts bemoan the fact that you can’t control steep time with this method.
How to Brew Using the Inverted Method
The inverted method has become the Aeropress method of choice for home and professional baristas alike. There’s a lot of variation in ways to do it, but the baseline methods are pretty similar.
With this method, you are going to start by placing the plunger upside down. Screw the body of the Aeropress, sans filter cap or filter, on top of the plunger. Then insert ground coffee to taste.
Bring your water to slightly below boiling. Fill the Aeropress about halfway with water and stir for 10 seconds. This will evenly distribute the water among all of the grounds. Fill the body completely and screw on the filter cap with a filter.
Let this steep for two minutes. At the end of the two minutes, quickly flip your Aeropress over your cup. Press down with the plunger.
If you want a thick cup of coffee, this is how you should use your Aeropress. Personally, I’m not a huge fan of thick and oily cups of joe, which means I rarely use the inverted method. But some people swear by it and I can see why it gives them what they want.
If you’re more of a visual person, here’s a visual guide to this method.
How to Make a Machine-Free Cappuccino
This can be considered a sub-method of the traditional method. The reason this is best with the Aeropress is the fact that, with an Aeropress, you get coffee that’s closer in strength to espresso than a traditional cup of coffee.
Brew a particularly strong cup of coffee (we recommend using about 3.5-4 scoops for it) using the traditional method.
While you’re waiting for your water to boil, fill a mason jar about halfway with low fat milk. Shake the jar until the milk starts to foam, and then put it in the microwave for about thirty seconds.
After you’ve brewed your coffee, open the jar and pour the scalded milk into the cup. Scoop the milk foam on top and you’ll have a lovely cappuccino. This is my favorite evening cup of coffee, and I don’t think there’s anything better than this at the end of a long work day.
Here’s a video guide to frothing your milk.
Convenience
One of the things people love most about the Aeropress is its convenience. Because it’s one of the smallest coffee makers on the market, you can take it on the go.
People have used their Aeropress’ everywhere from cafes to camping trip. There are even stories of caffeine-craving travelers using their coffee maker on flights and train trips.
As long as you can find hot water in a location, you can make a cup of coffee with your Aeropress. This gives it an automatic edge over most other coffee makers, as even a french press can be a bit too bulky to take on a camping trip.
Outside of the fact that you can take it anywhere, one thing that will attract anybody who’s ever watched their fingernails turn brown cleaning out their coffee maker will adore about the Aeropress is the fact that it’s the closest thing on the market to a no-clean up method.
There’s nothing worse than having to wait to drink your morning coffee because you have to scrub your french press. That makes the easy clean-up of the Aeropress a blessing from the coffee gods.
Simply pop out the filter cap and use the plunger to push out the grounds and filter. Because of the fluid dynamics of the coffee maker, you only need to give your Aeropress a quick rinse after this.
Finally, the Aeropress makes coffee incredibly quickly. From the moment your water finishes heating, you’ll get a fresh-brewed cup of coffee in 20 seconds or less. This is far superior to other methods, which require you to wait minutes for a cup of coffee.
That being said, it’s not all perfectly convenient with the Aeropress. I use it because it’s a single-cup coffee maker, but if you’re looking to make coffee at a large quantity this is a bad method. If you have a lot of breakfast and dinner guests you make coffee for, you should have a large-scale coffee maker on top of the Aeropress.
Related: Want a Delicious Brew? 5 of the Best Tasting Coffee Makers
Single Shot Review
The Aeropress is a quick, easy, and versatile method of brewing coffee. Whether you want a laborious cappuccino or a quick cup on your camping trip, it’s the perfect method for making a cup of coffee without a fussy clean-up or long wait.
That being said, no method is perfect. The Aeropress can really only brew one cup of coffee. While individual cup drinkers can brew their coffee quickly, if you have company you may find yourself choosing another method if only for the sake of speed and conversation.
In addition, purists who prefer manual methods like the pour-over and french press method may find themselves lacking control with the Aeropress. While the method gives plenty of control over the strength and thickness of a cup of coffee, the temperature and time-based control of these methods are certainly lacking from the traditional method. The inverted method, however, gives equal time-control to brewers as the french press.
Still, this is a method that’s easy, fun, and brews a great cup of coffee.
Related: Aeropress vs Pour Over: Which method produces the best brew?, Burr Grinder vs Blade Grinder: Which Method is Better?
Aeropress

Pros
- Brews your coffee incredibly quickly
- Very little bitterness and acidity
- Easy to use
- Almost no clean-up
- You can take it anywhere
Cons
- You can only brew one cup of coffee with it
- Traditional method doesn’t give you the same control